I recently stumbled over the WGA the damned kickstarter, and with some recent ideas about trying out imperialis militia in horus heresy, I couldn’t hold back pledging for a 3 box set. With this additional 100+ minis coming in at some point, I looked at my box of primed renegade infantry and got motivated to get them done before the reinforcements could arrive.
I read a blog on Dakkadakka where a guy did a whole imperialis militia army as one big batch paint job and decided that this was the way to finish off this big backlog. I think the biggest batch I’ve done earlier is about 20 models, so 110 would be a challenge.
The minis were already zenithal airbrushed with their uniform color, so there was nothing stopping me from plowing on. I will say that having built and primed your models is a great step towards having them painted. It is much easier to get them done when a sudden boost of inspiration hits if they are ready to go. My renegade ogryn were not primed, so they missed out on this batch paint job.
Painting process
So I will remember when the damned arrive. It is my own take on Catgut’s speed-painting with glazes:
- (prep) Prime black, then zenithal white prime
- (prep) Airbrushed dunkelgelb, then airbrush zenithal dunkelgelb highlight
- (block) Block in non-uniform areas. “Black templar” hoods, “wyldwood” shoes and guns, “fleshtearer red” some cloth details, flags and dynamite, “warp lightning” grenades
- (block) Bone and skin “ivory”
- (block) Metals with “scorched metal”
- (block) Gold areas with “polished gold”
- (high) Highlight metal with “shining silver”
- (high) Highlight uniform and grenades with “dunkelgelb highlight” + “ivory”, about 70/30 mix
- (high) Highlight brown with a mid-tone brown
- (high) Highlight red with red-orange mix
- (high) Highlight black with mid-tone grey
- (shade) Shade skin with contrast “dreadful visage” and thinned “magos purple”
- (high) Highlight skin with “white”
- (shade) Shade entire model with thinned “black glaze”
- (base) Paint all lenses and OSL areas white
- (OSL) Fluorescent orange lenses and most OSL areas
- (shade) big OSL areas shaded with “gryphon orange” contrast paint
- (OSL) OSL areas and big lenses white on brightest area
- (OSL) “Imperial fist” on white areas, white on brightest spots
- (OSL) “Fluorescent yellow” on the previous area
It seems like a lot, but many of the steps are quick. When I say “highlighting”, it is a very quick edge highlighting, not being too bothered if it comes out a bit too thick. The black glaze stage pulls it back down anyway. The worst step is probably the metal one, but at least “scorched metal” is a very well-covering paint.
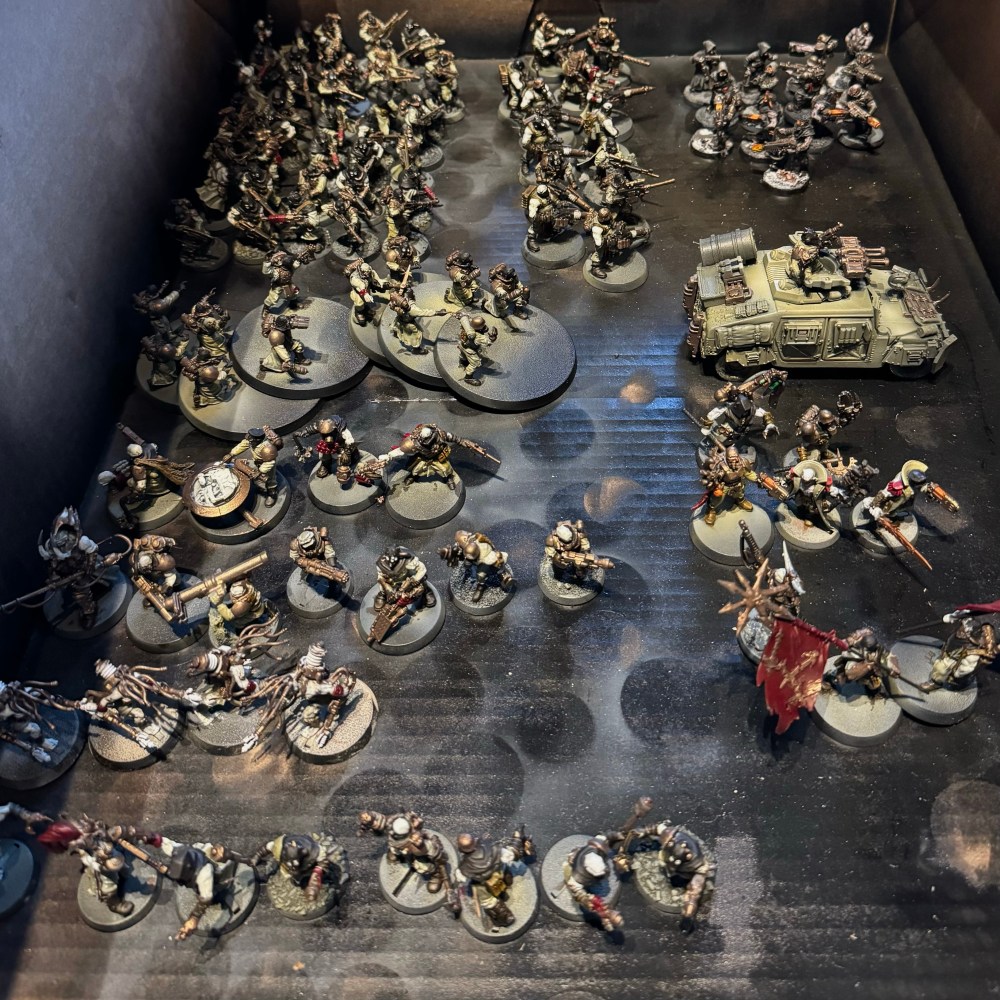
It took about a week of painting a few hours a day to get through them all. I am actually shocked at how easy it felt. I broke each step into batches of 10-15 models at a time, completing all 110 minis before moving on to the next step.
I did some thinking about how to cut time, and especially the OSL step was much simplified from my earlier version.
Basing
I have previously spent a lot of time on the snowy urban basing for my renegades. However, I’ve not really been that happy with the results. The snow blends a bit too much into the light grey rubble, and the paint scheme is almost too well camouflaged against the base. The results do not really stand up to the effort. I also didn’t want to rip 110 minis of their bases, so I decided to try something new.
I used “AK Asphalt” paste to add a nice dark base layer and texture to the bases. Then I realised that it also worked as a glue, so I just dipped parts of the base into a “rubble mix” I’ve made, and BAM, instant base. Some “army painter snow” (decisively the best I’ve tried) added, and I ended up with a very quick, but IMO better looking urban winter base than the ones I have made before. Some bases got some cork here and there for larger rubble, and I can add bricks, skulls and rusted clutter later, but for now, this is good enough. The heroes got a brushing of “asphalt road dirt” pigment.
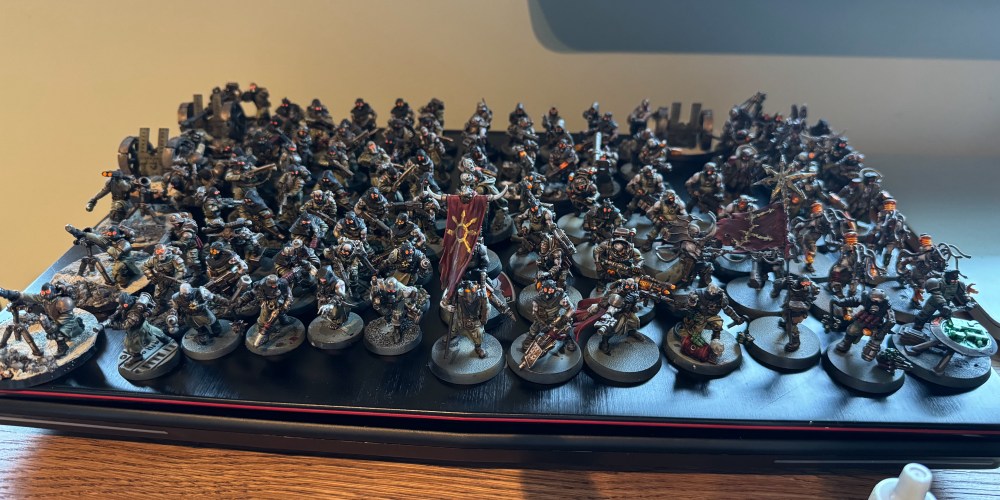
Finished
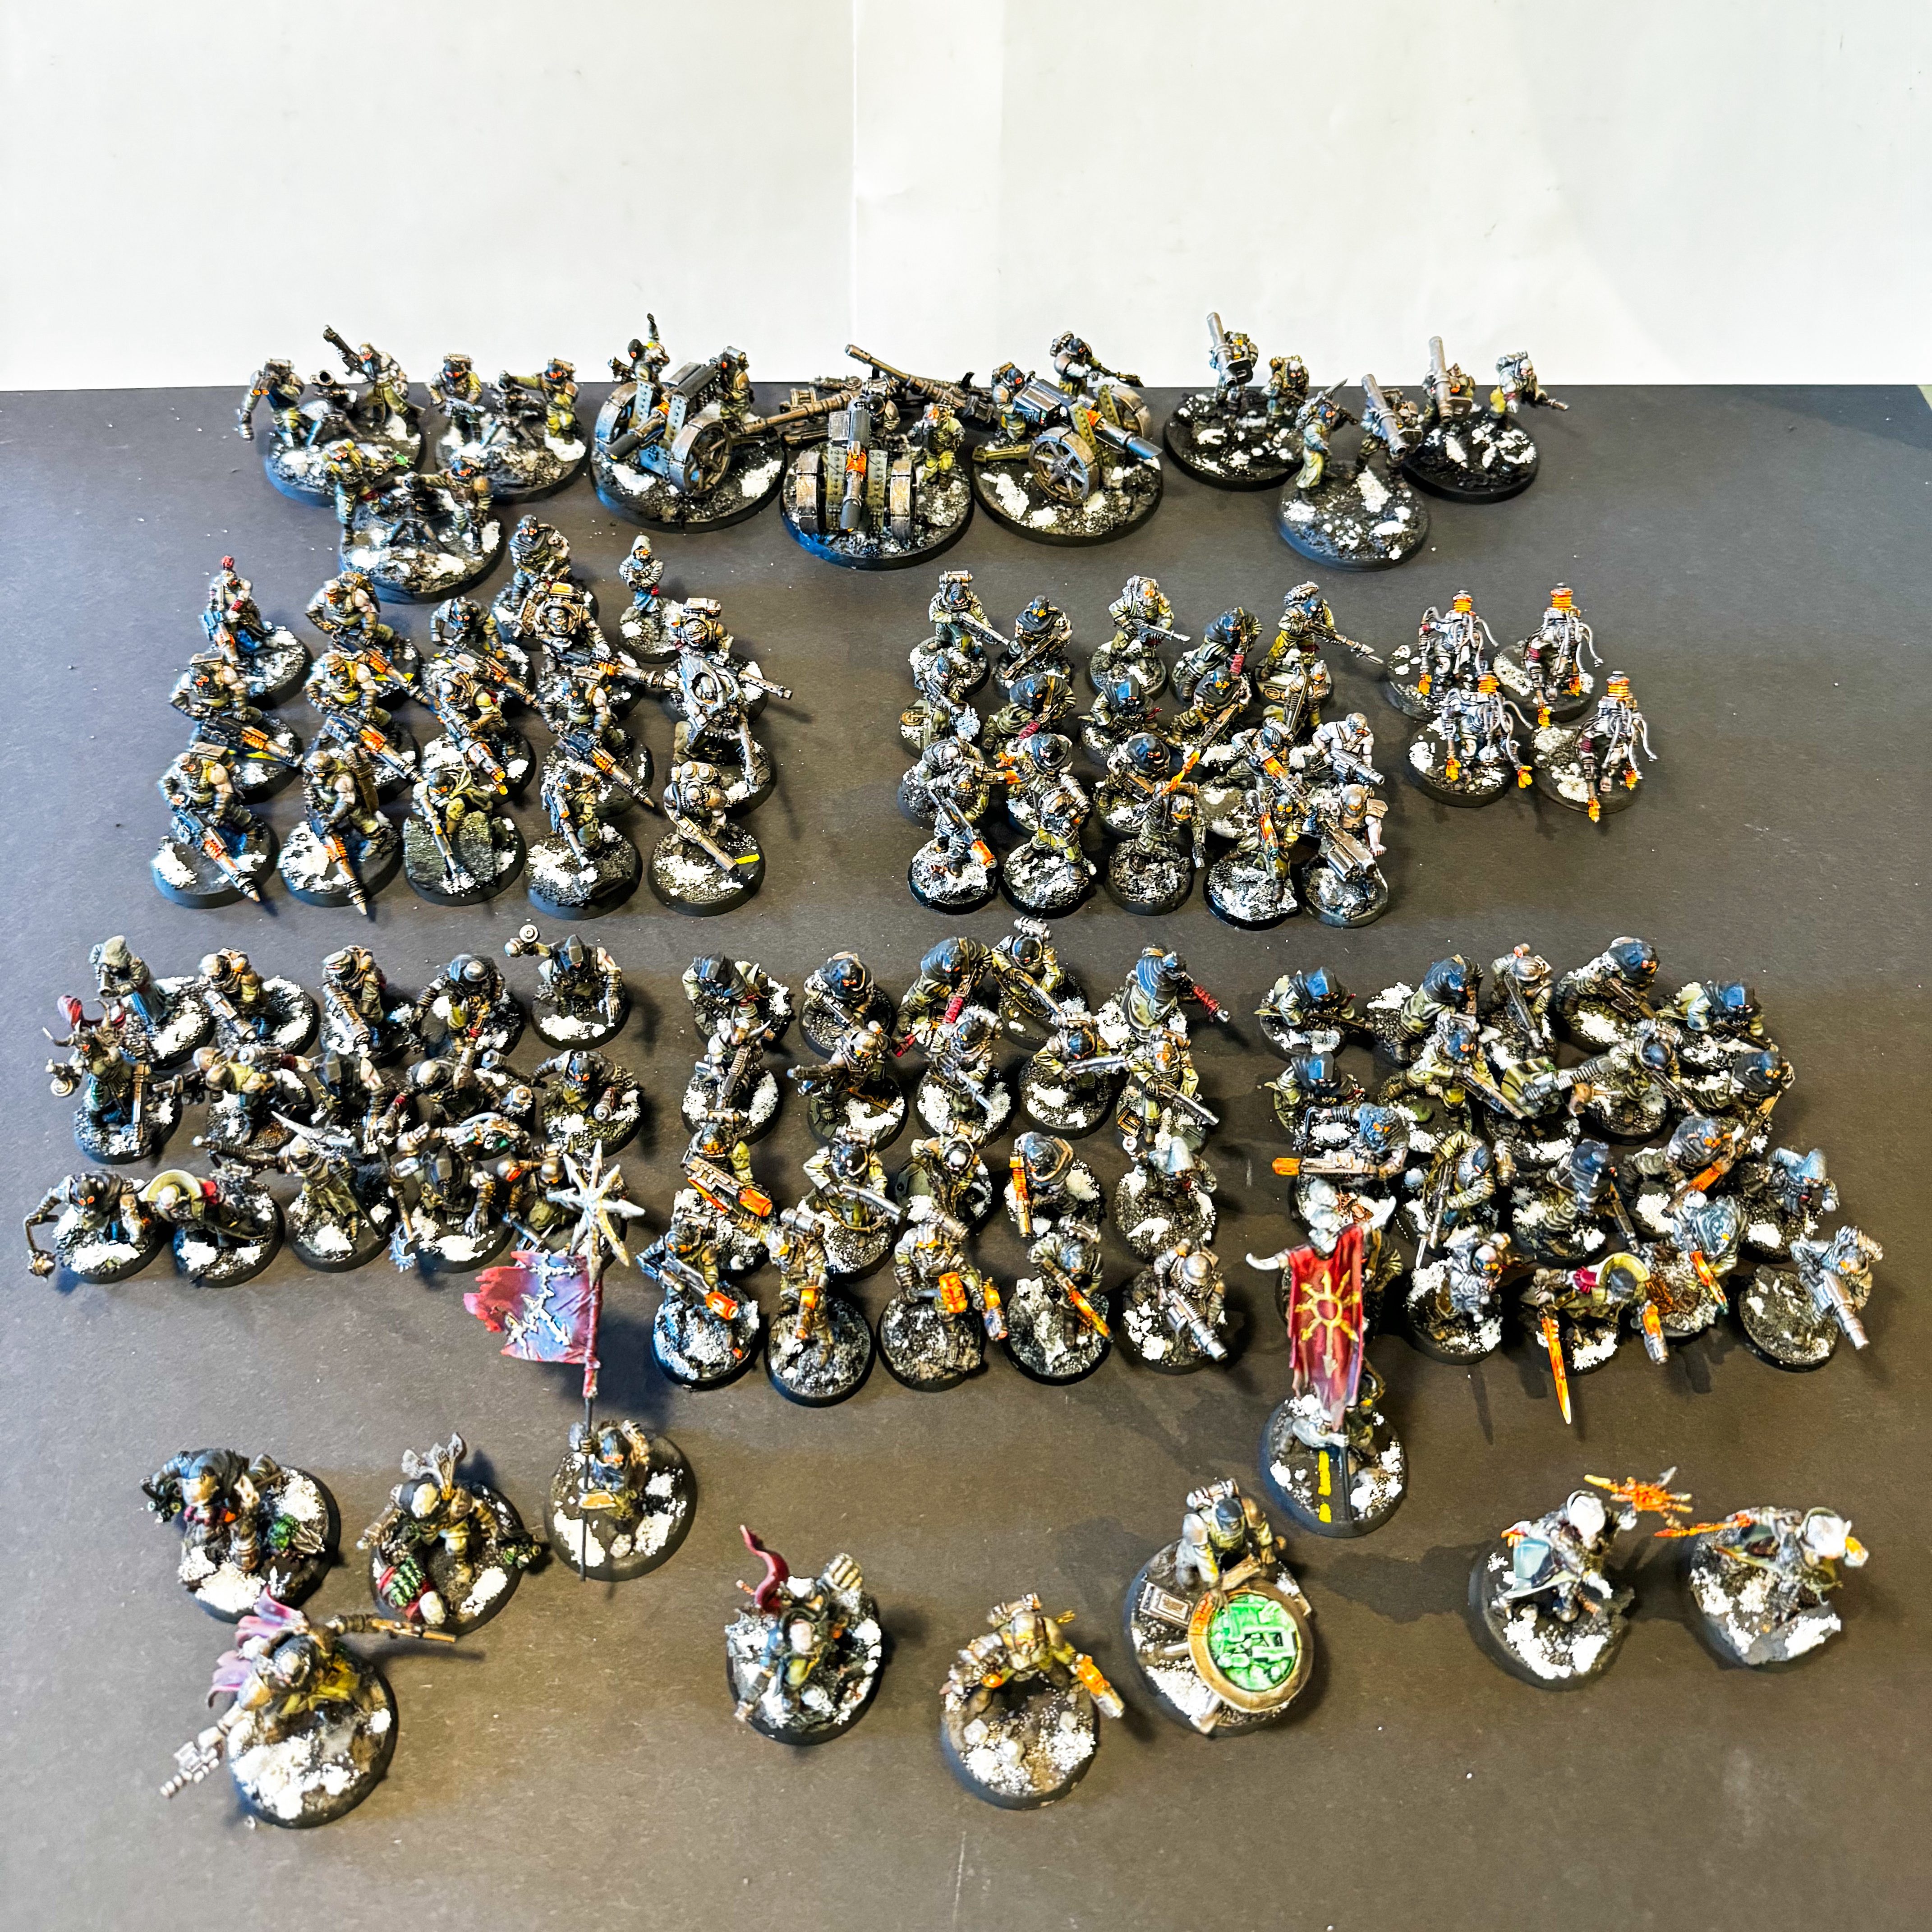
Individual minis won’t win any painting competitions, but as an army, I think they look really good. Personally, I love the orange glow effects, they bring out the “hellgast” look, and take the army from a dark blob into something more eye catching. It is also very effective at making the special weapons more visible.
The snow contrasts very nicely with the asphalt basing, and brings some light to an otherwise dark army. Contrasting basing is a nice trick to bring the overall look of the army up a notch. I’ve committed to snow, but I’ve seen great results with martian earth and similar as well.
I’ve recently also batch painted 7 armoured vehicles for my renegades, so I think it might soon be time for an army overview of this now fairly large force.

I find 40 figs to be the transition point where I start to hate my life. Congratulations on a massive batch paint! If/when you do a parade make sure you get some ‘zoomed in’ shots
LikeLiked by 1 person
That is great work- never underestimate the mass effect of a quickly but fully painted army.
Cheers,
Pete.
LikeLiked by 1 person